Warehouse efficiency is a critical part of any product-based business. With the release of Odoo 18, managing warehouse operations has become even more streamlined, thanks to features like barcode scanning. This powerful tool minimizes manual errors, speeds up operations, and provides real-time inventory updates.
Whether you're a warehouse manager, Odoo functional consultant, inventory controller, or a business owner looking to optimize your logistics—this guide is for you. We'll walk you through the complete process of setting up barcode scanning in Odoo 18 in a step-by-step format.
What is Barcode Scanning in Odoo?
Barcode scanning in Odoo allows warehouse users to process operations like receipts, deliveries, inventory adjustments, and internal transfers using a barcode scanner or mobile device. This eliminates the need for manual data entry and ensures accuracy.
Benefits of using barcode scanning in Odoo 18:
- Accelerated warehouse operations
- Fewer human errors
- Better tracking of inventory
- Seamless integration with stock movements
Prerequisites Before Setup
Before setting up barcode scanning in Odoo 18, make sure you have the following ready:
- Odoo 18 installed and running
- Inventory module installed and configured
- Barcode module installed
- Barcode scanner device or mobile device with a camera
- Proper user access rights for Inventory and Barcode operations
Step-by-Step Guide to Set Up Barcode Scanning
1. Activate the Barcode Module
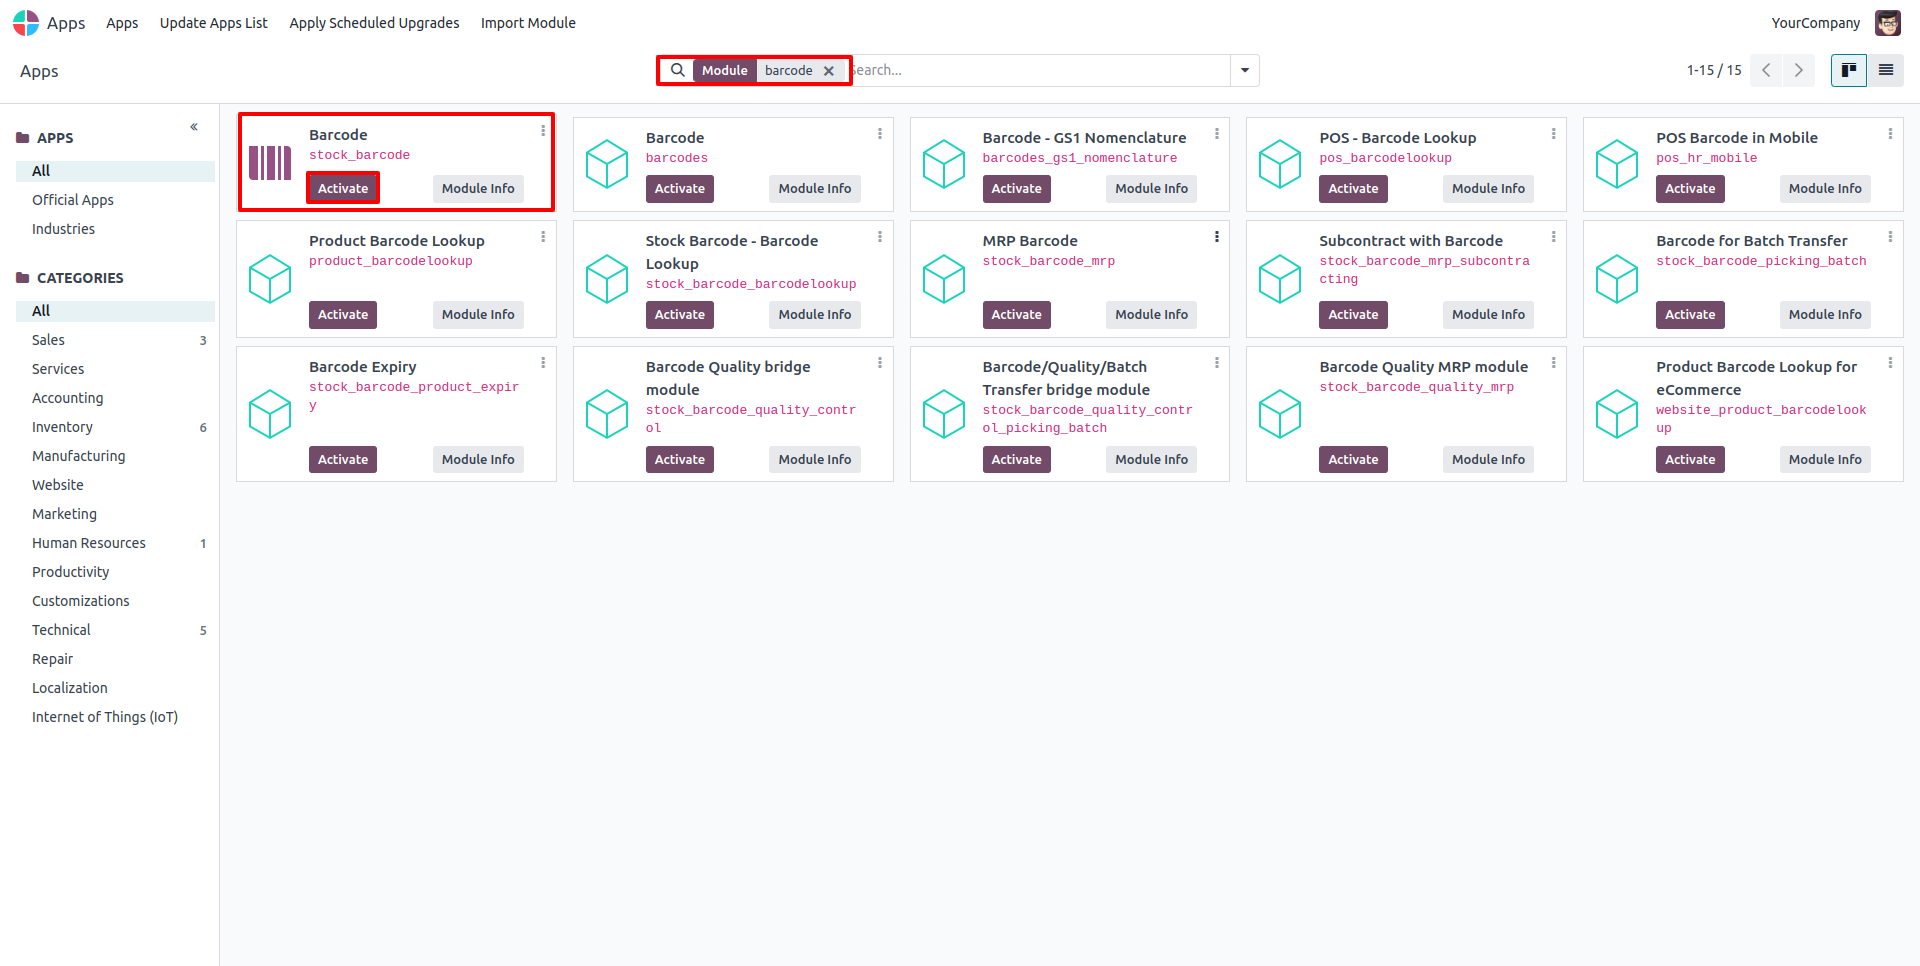
- Go to Apps in Odoo.
- Search for "Barcode".
- Click Install.
Once installed, the barcode features will be integrated into your inventory operations.
2. Configure Warehouse Settings
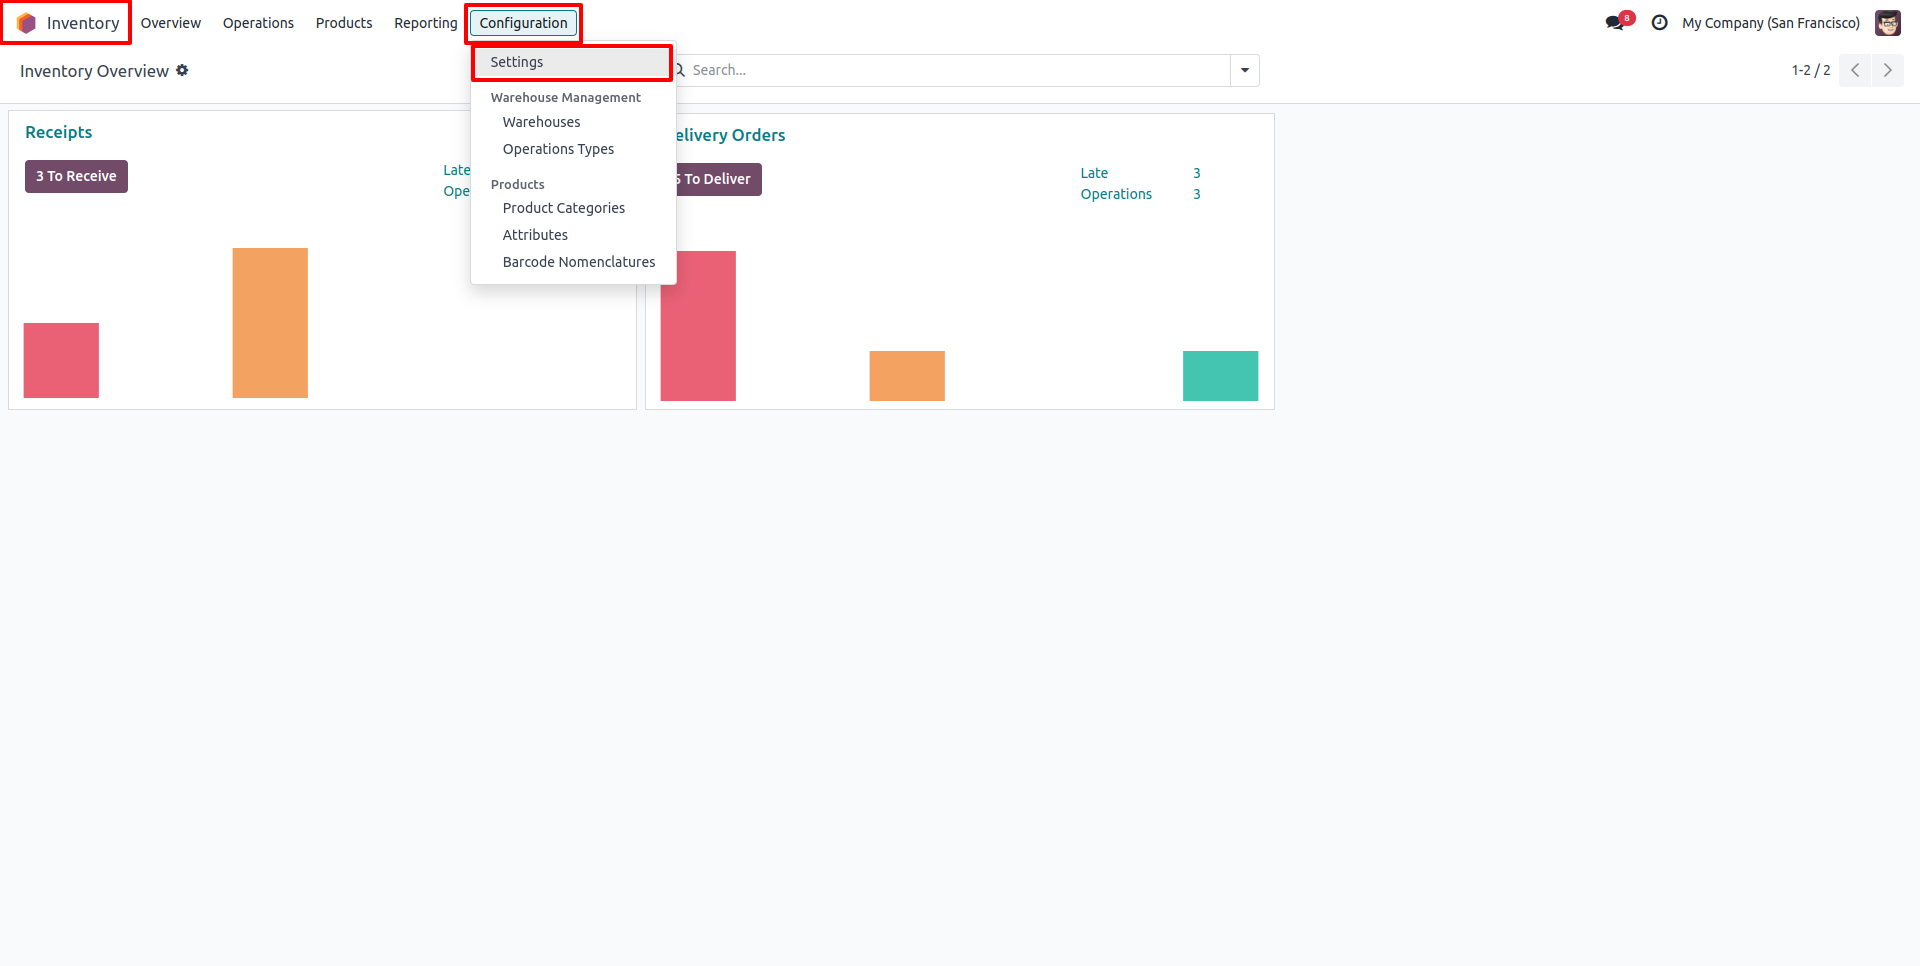
- Navigate to Inventory > Configuration > Settings.
- Enable the following options:
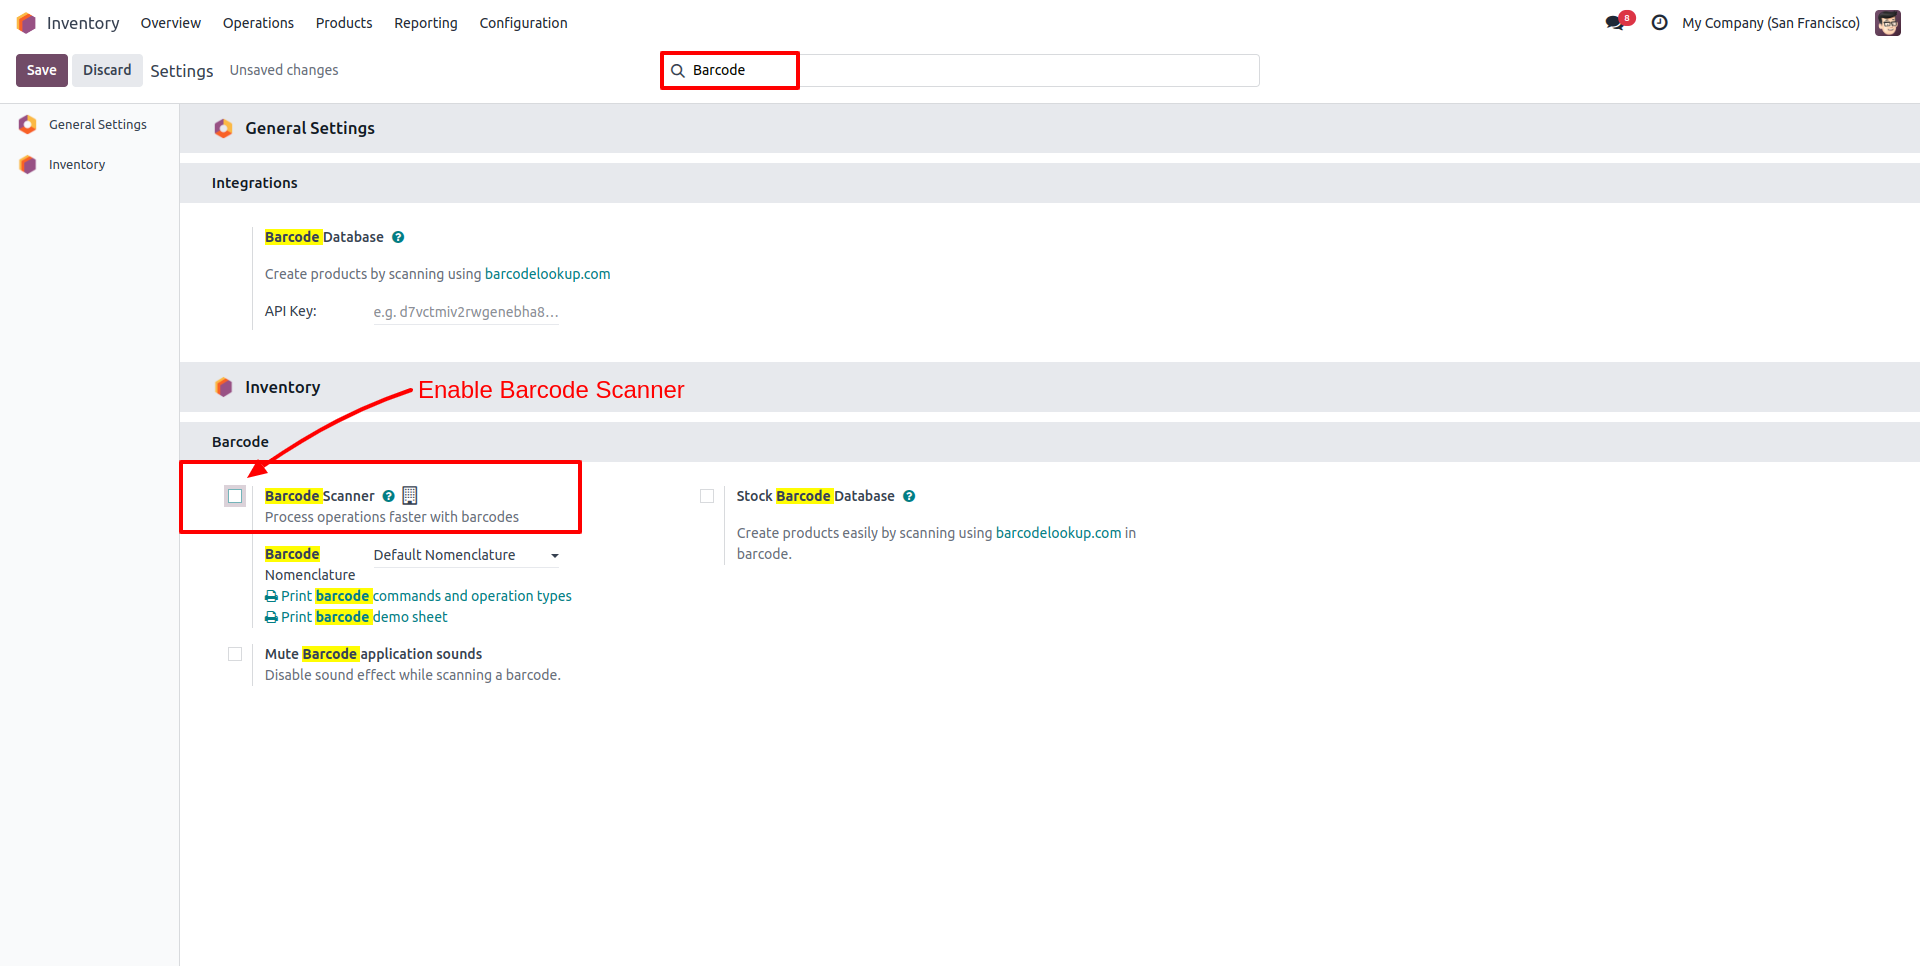
- Barcode Scanning
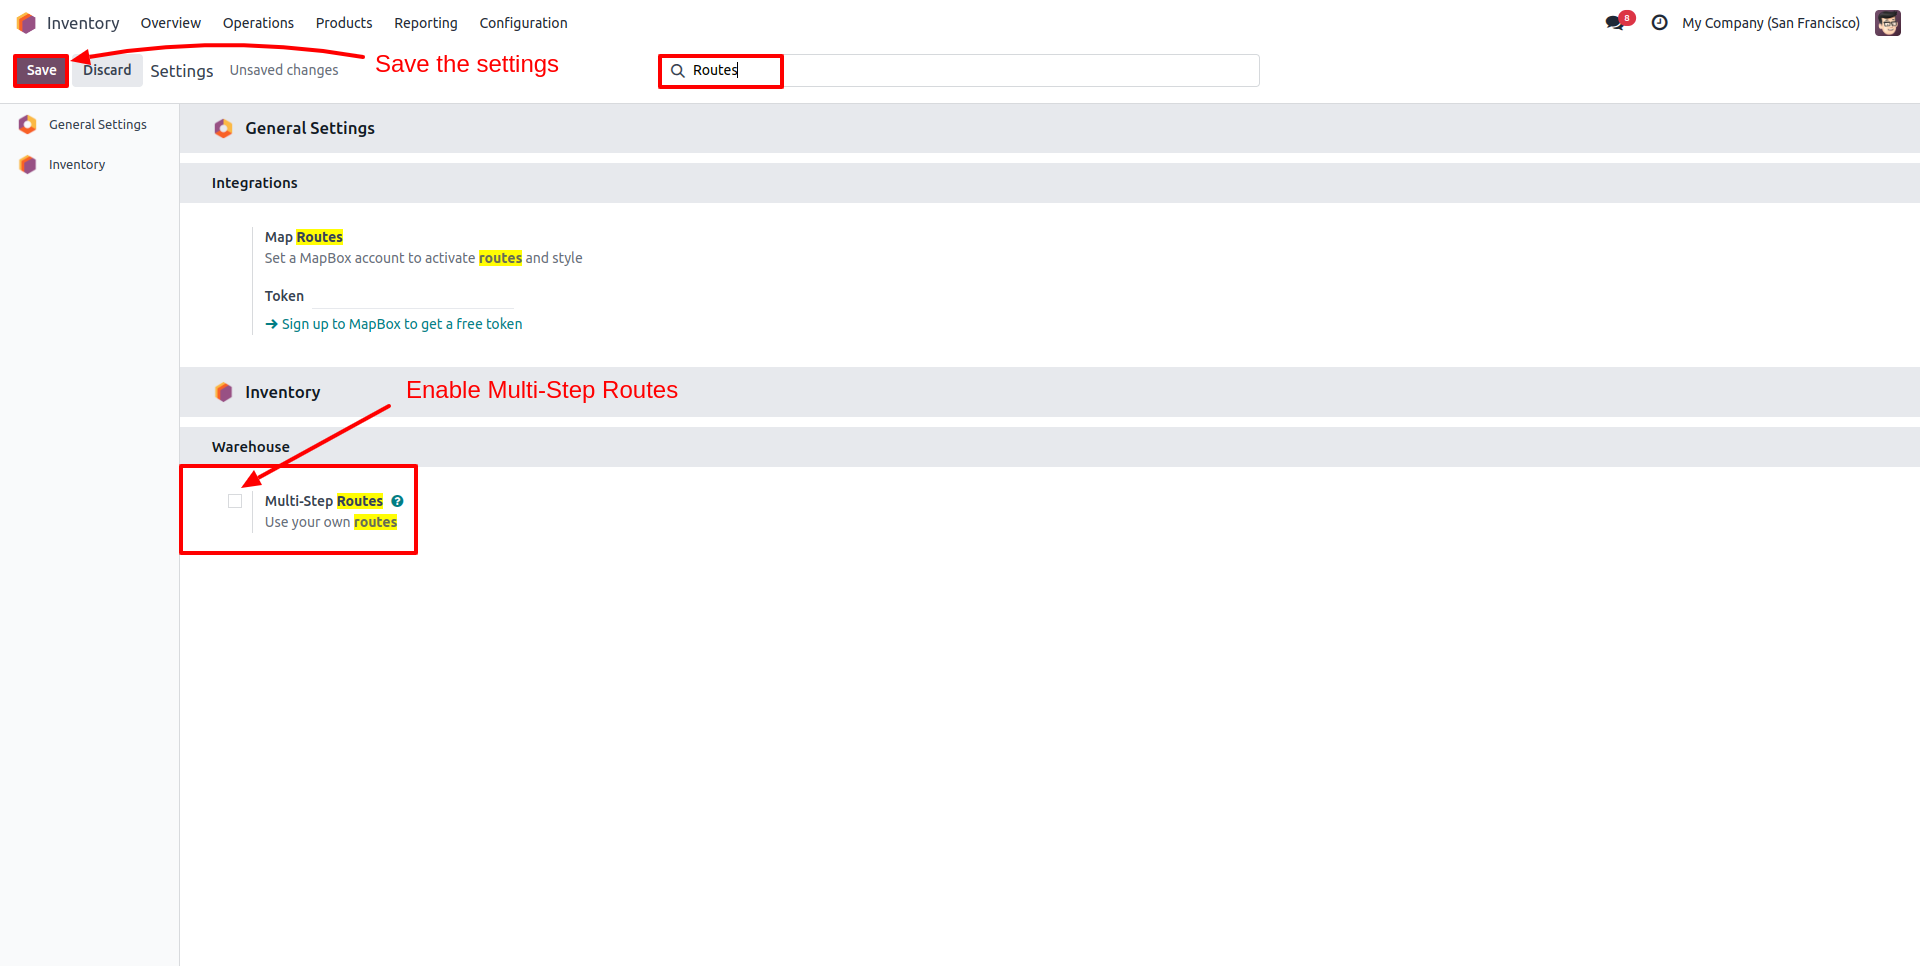
- Multi-Step Routes
- Save your settings.
3. Assign Barcodes to Products and Locations
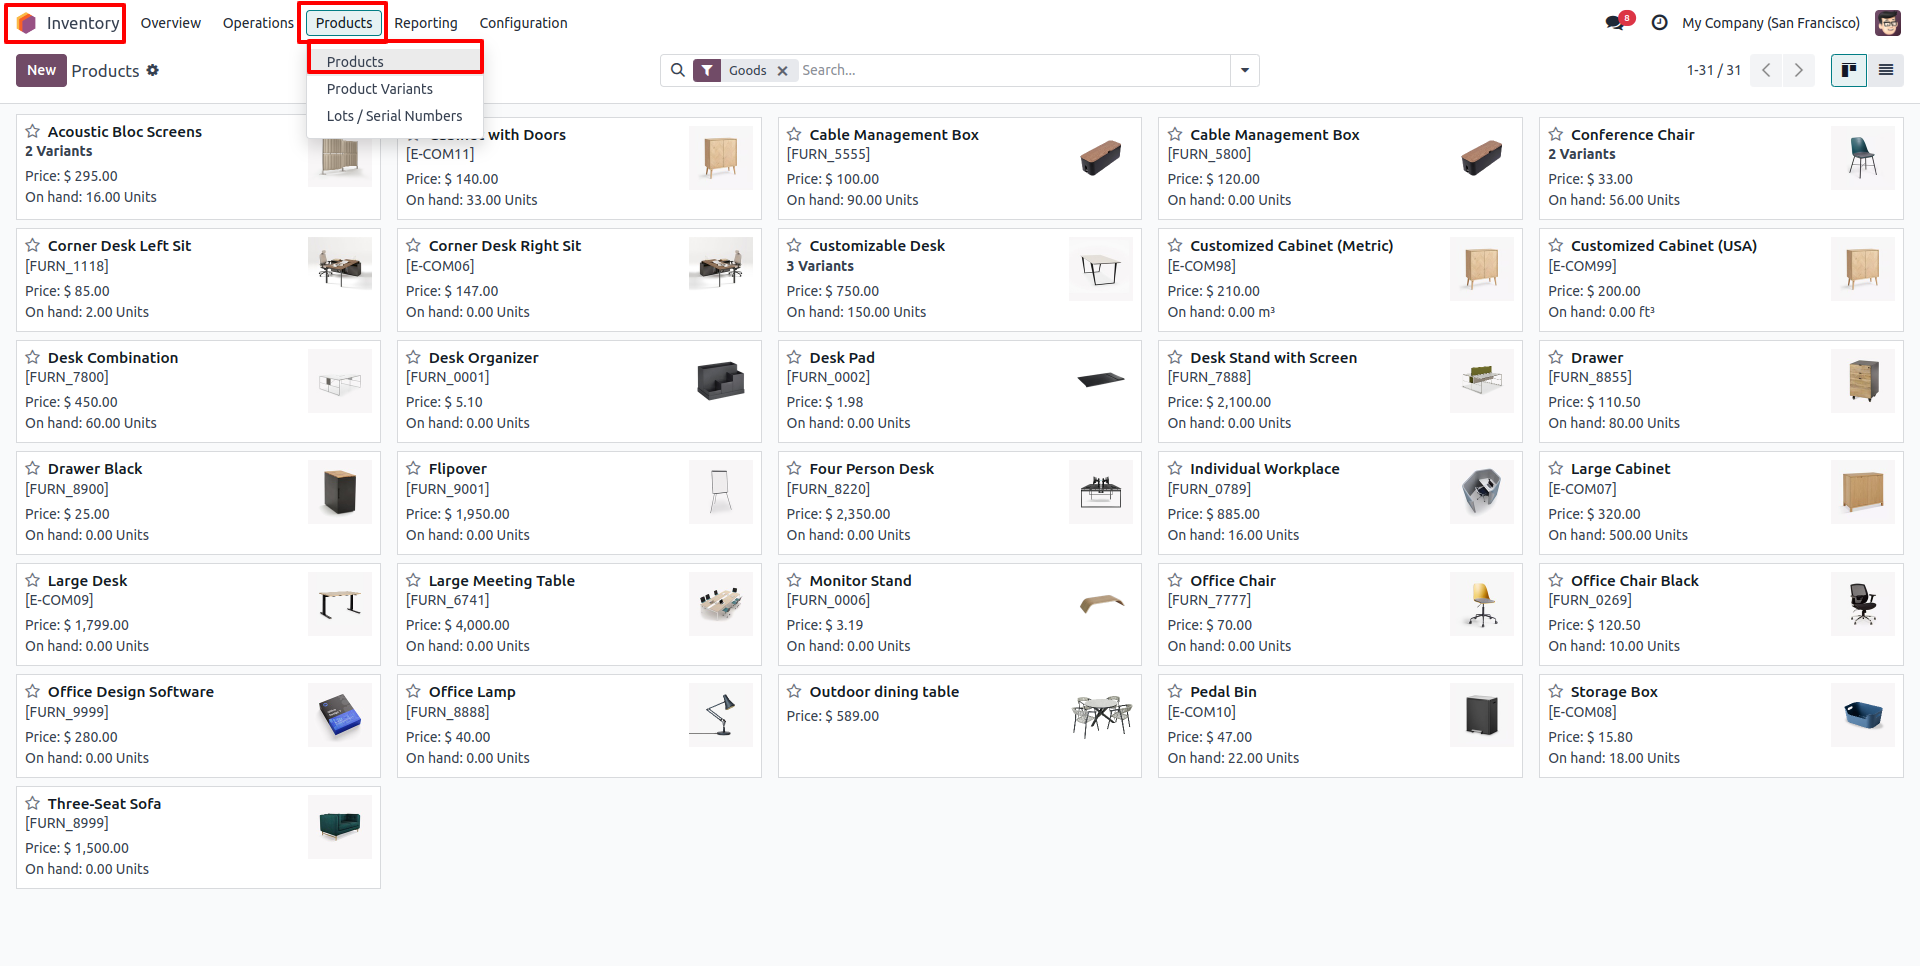
- Go to Inventory > Products.
- Open a product and find the Barcode field.
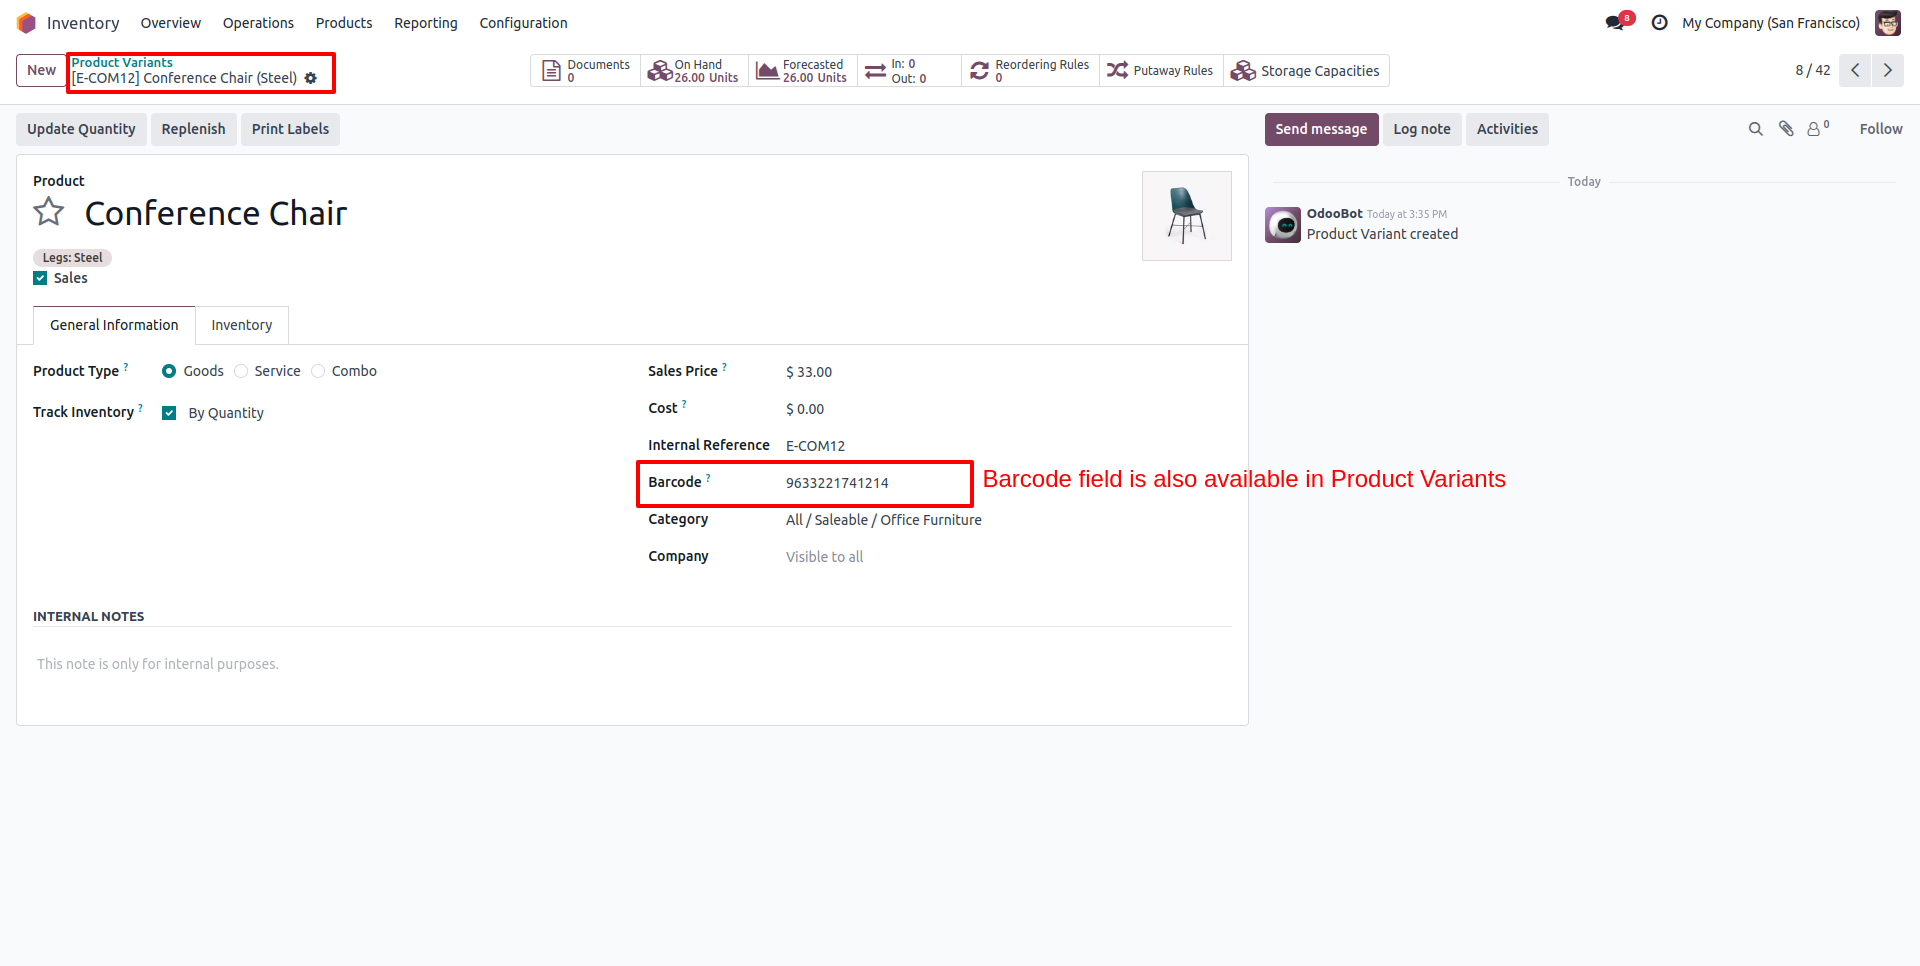
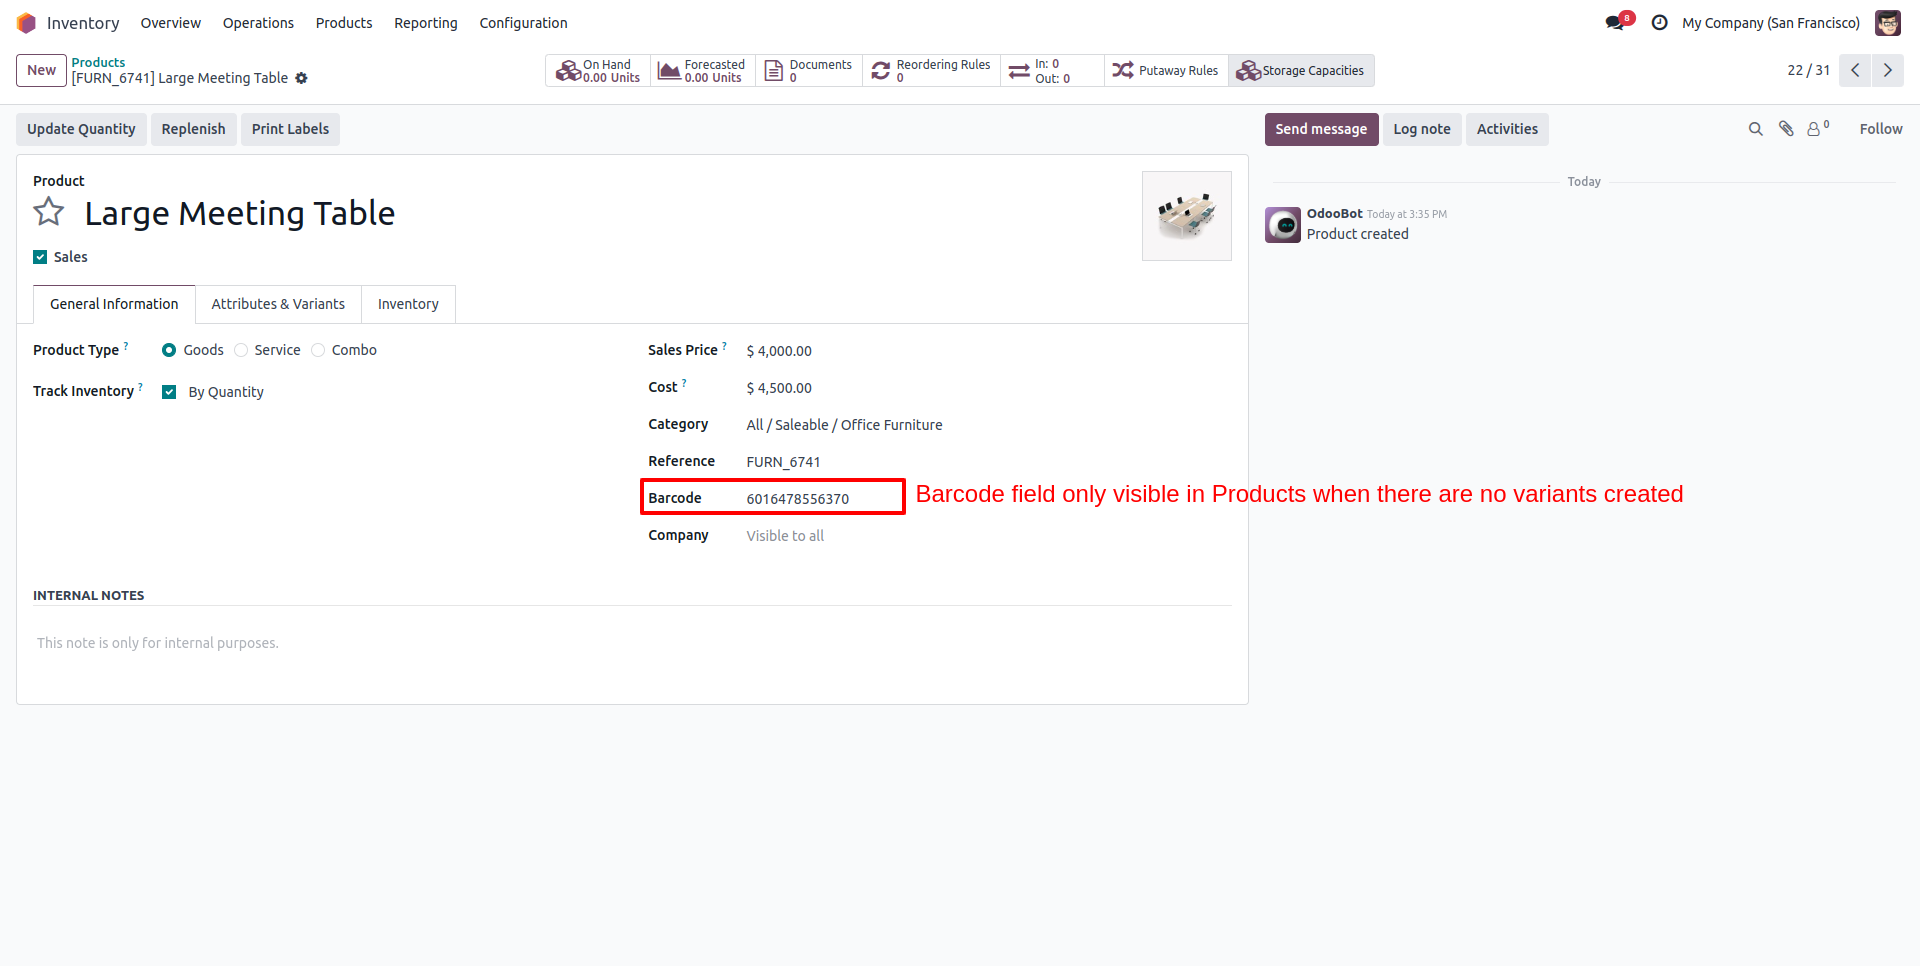
- Enter the barcode value or generate one.
You can also assign barcodes to:
- Storage locations
- Lots or serial numbers
- Packages
4. Printing Barcode Labels
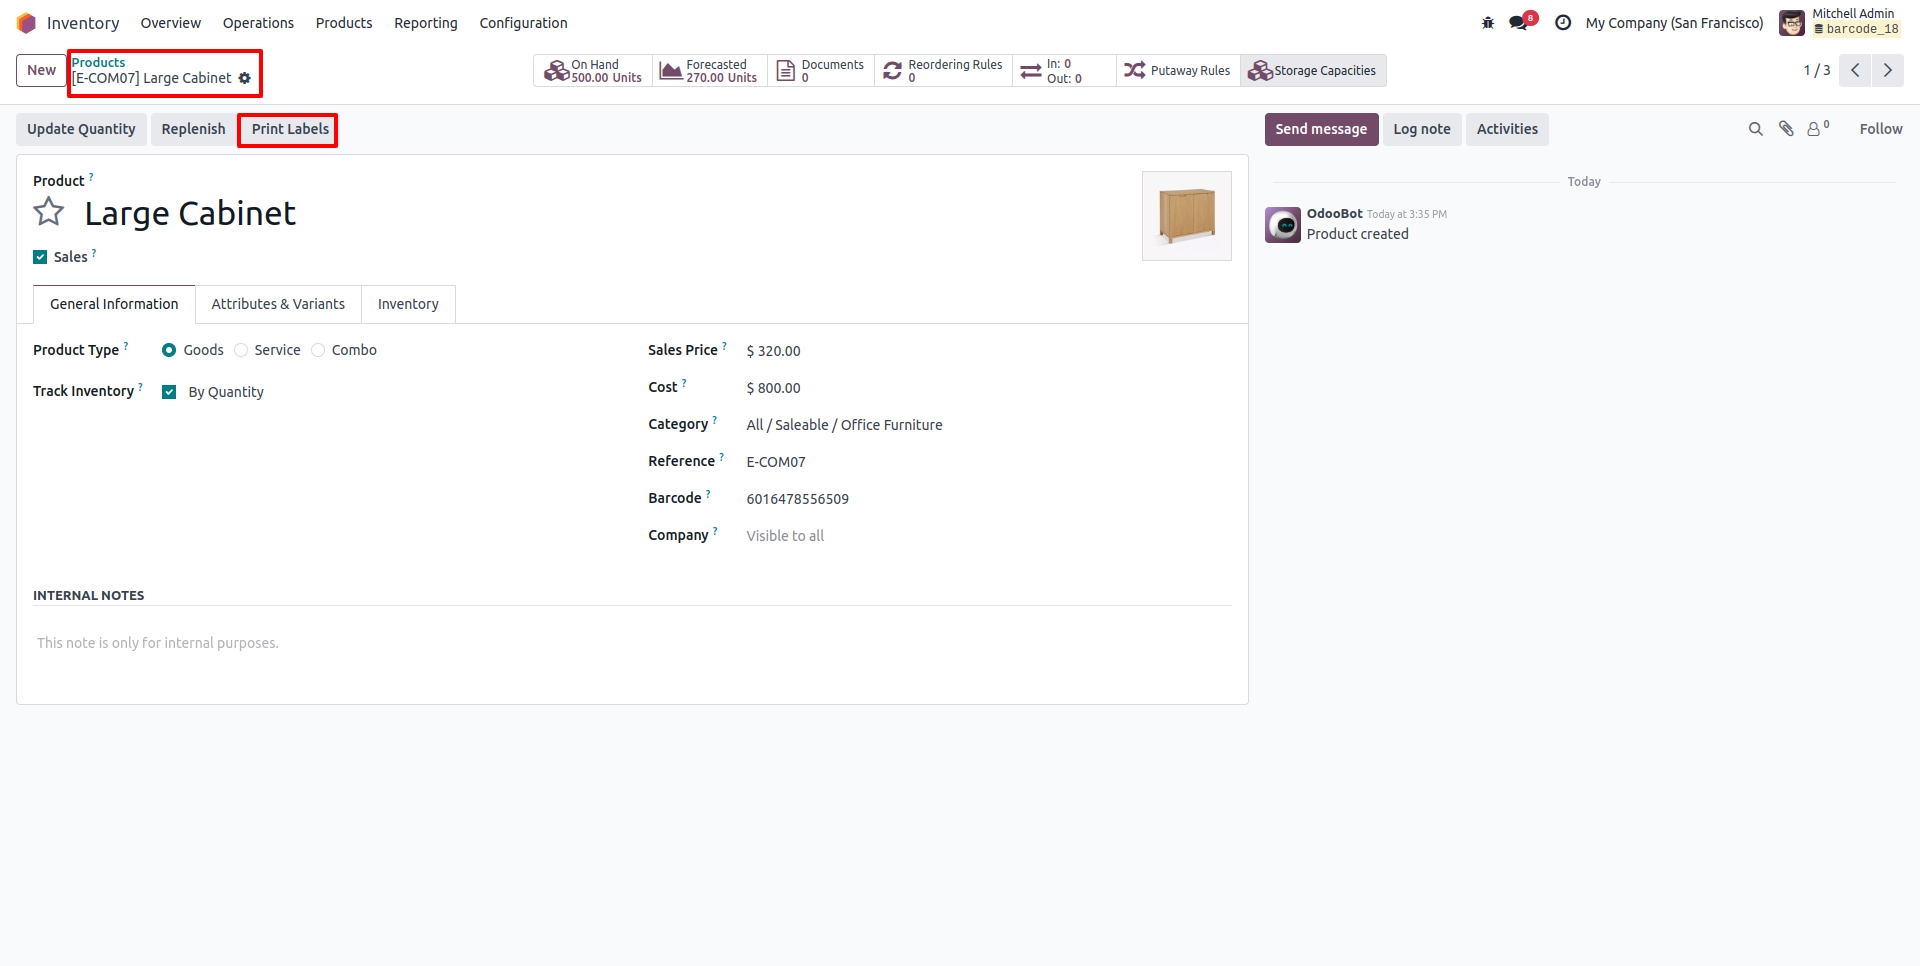
- From any product or location form, click on Print > Barcode Labels.
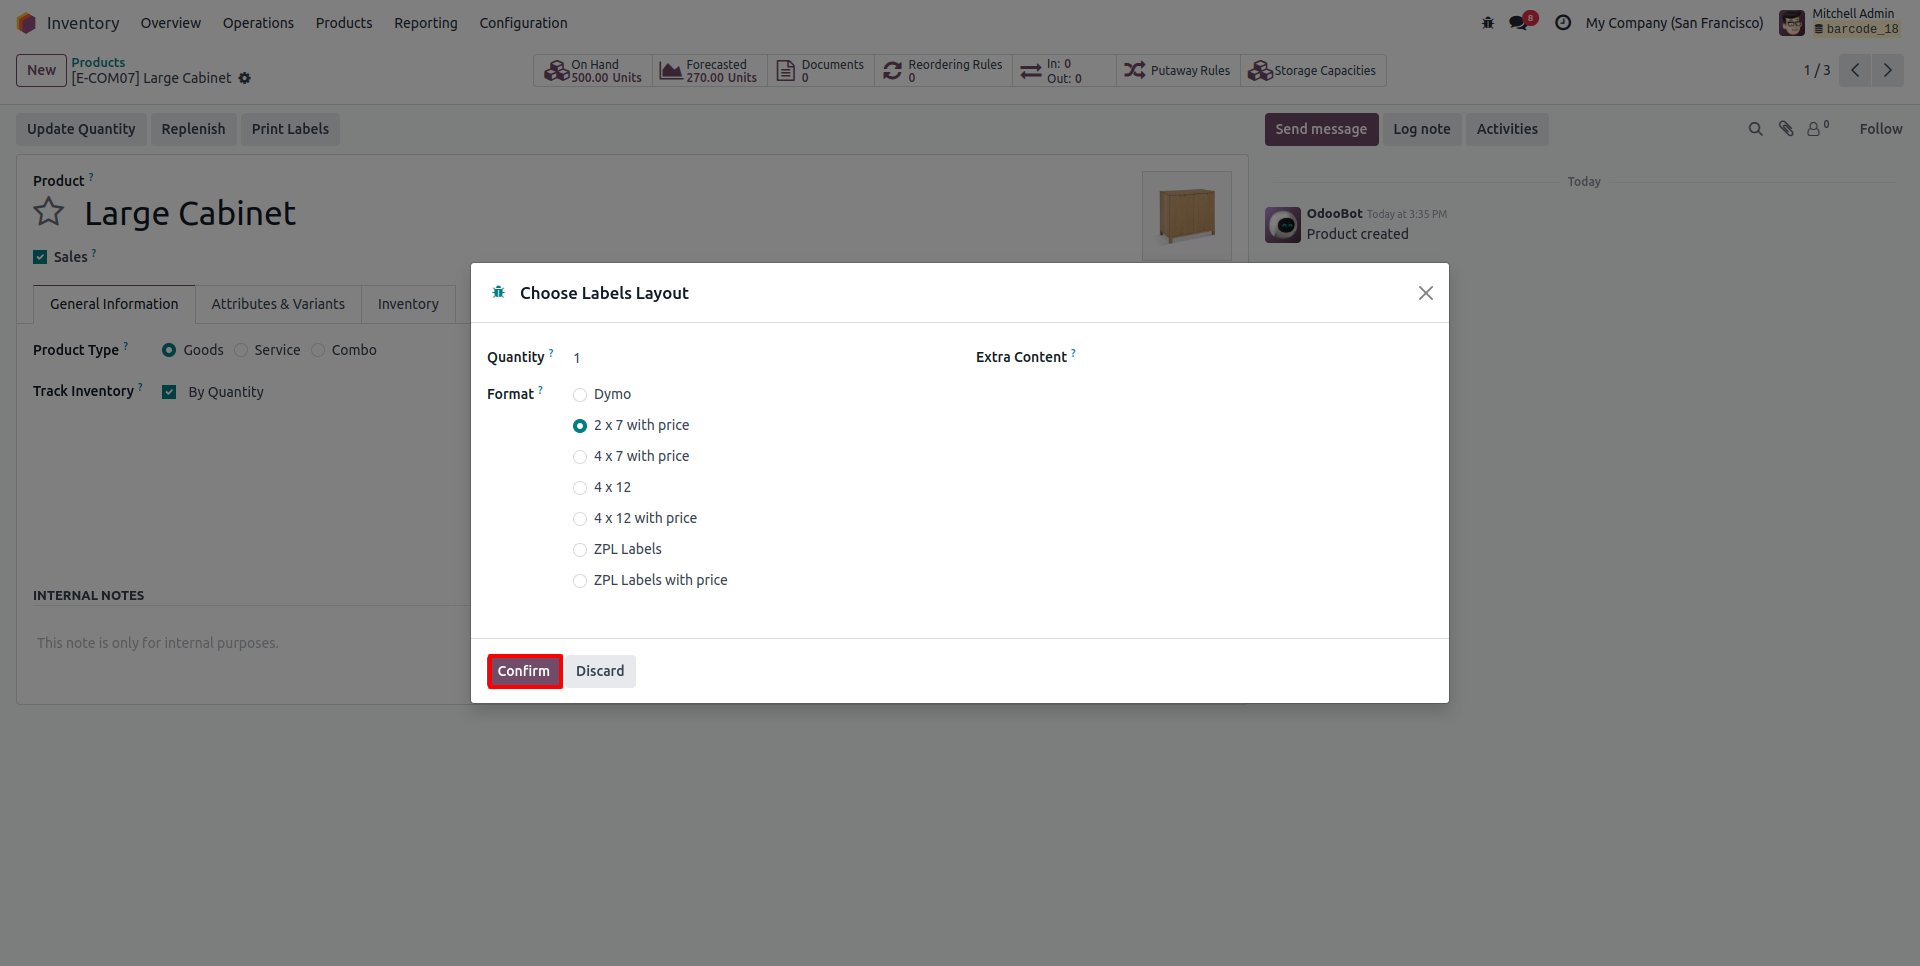
- Choose the label format and printer settings.
- Print and attach them to physical items or areas.
5. Use the Barcode Interface
- Go to Barcode > Dashboard.
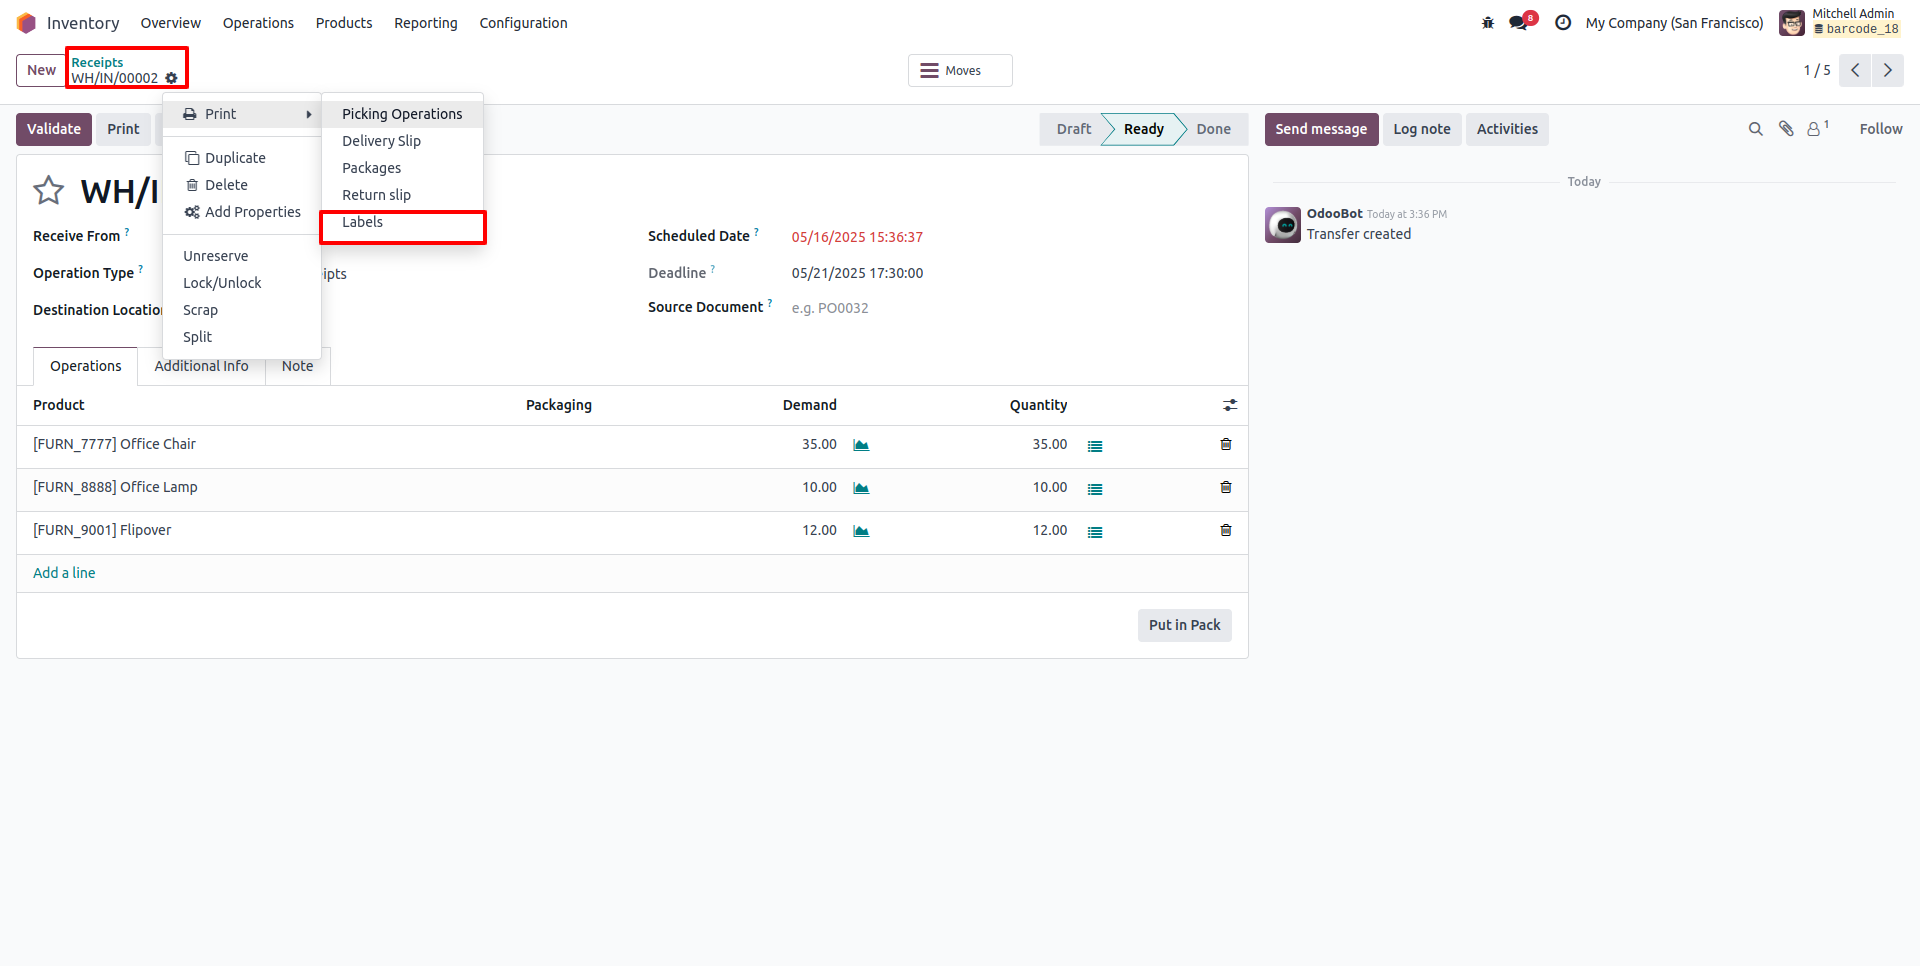
- Select an operation (e.g., Receipt, Delivery, Inventory Adjustment).
- Scan the product or location barcode using a scanner or camera.

Odoo will automatically process the action based on the scanned code.
Testing Your Setup
Before going live, test your barcode configuration by simulating a real-life stock movement:
- Create a test product with a barcode
- Assign it to a receipt or delivery order
- Scan using the barcode interface
- Verify if Odoo updates the status in real-time
If you face issues:
- Check the barcode format (EAN-13, Code128, etc.)
- Ensure the barcode is correctly linked to the product/location
- Confirm user permissions
Best Practices for Using Barcode Scanning in Odoo 18
- Use durable, scannable labels: Print high-quality barcodes that don’t fade or tear easily.
- Train warehouse staff: Ensure they’re comfortable with the interface and device usage.
- Regularly audit barcodes: Remove duplicates and keep them up-to-date.
- Use mobile-friendly features: Odoo 18 supports mobile scanning for more flexibility.
Conclusion
Barcode scanning in Odoo 18 is a game-changer for warehouse operations. It boosts speed, accuracy, and real-time visibility—helping businesses stay agile and efficient. With this guide, you’re now equipped to set up and start using barcode scanning in your warehouse.
Still need help with advanced setup or integration? Our Odoo experts are here to assist you.
Call to Action
Need a customized barcode scanning solution in Odoo 18? Contact us for expert support and implementation tailored to your business.
How to Set Up Barcode Scanning in Odoo 18 Warehouse